If you’ve been using Django, you know that the migrate function creates a locally stored sqlite database. But what if you want to upload your website to the internet and use a MySQL database?
In this example I will use an AppSeed template.
# skip this if you already have your django website
clone https://github.com/app-generator/django-dashboard-dattaable.git
cd django-dashboard-dattaable
pipenv shell
pip install -r requirements.txt
python manage.py makemigrations
python manage.py migrate
python manage.py runserver
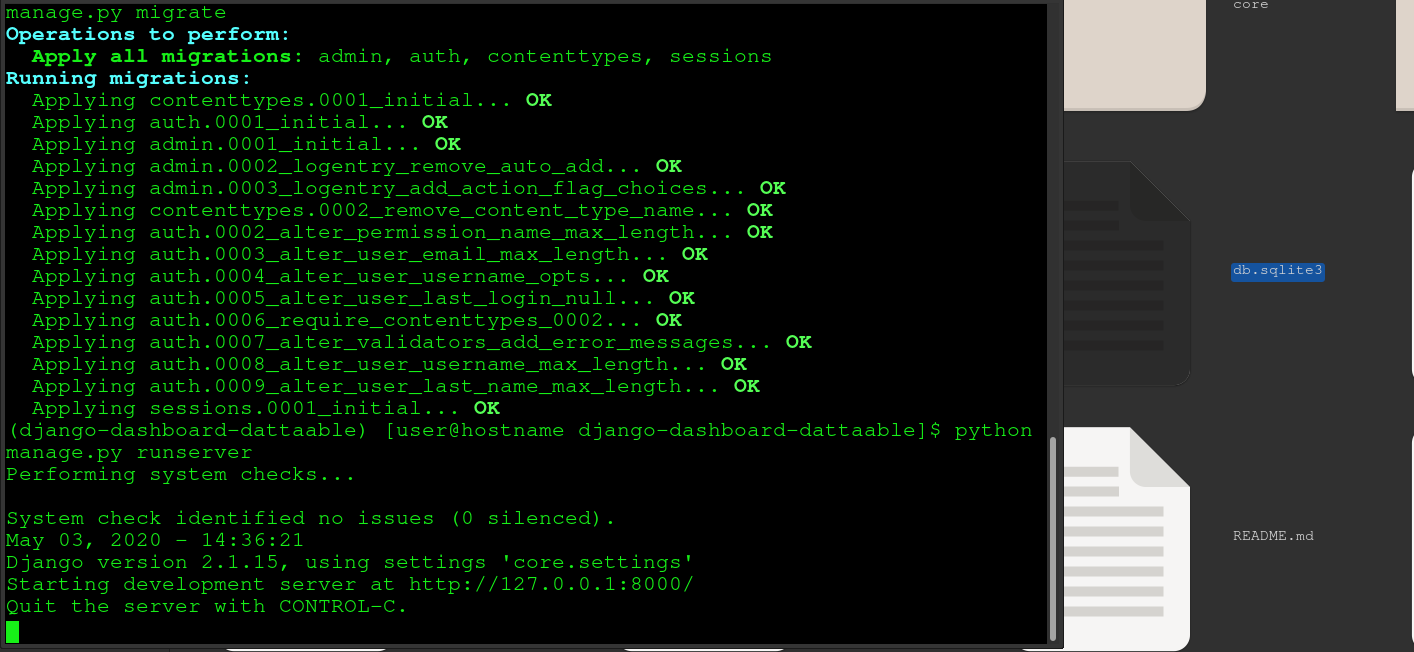
The website should now be at localhost:8000.
But how do you move this website to the Internet?
You need a server and to convert the SQlite db into MySQL. It is available on most OS’es:
brew cask install db-browser-for-sqlite # MAC
sudo pacman -S db-browser-for-sqlite # ARCH
sudo apt install sqlitebrowser # DEBIAN UBUNTU
yum install sqlitebrowser # CENTOS RHEL
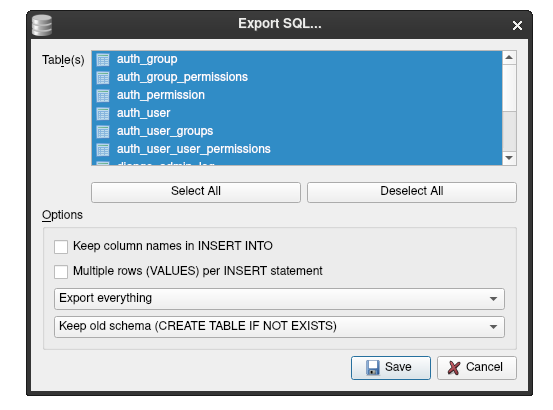
Inside your Django project folder, open db.sqlite3 using the SQLite browser.
File > export > Database to SQL File
Open the new file called db.sqlite3.sql inside a TEXT EDITOR, like VSCode or Sublime Text
You need to replace exactly the follow things:
Replace this column |
with this column |
| [cc]”[/cc] | [cc]'[/cc] |
| [cc]AUTOINCREMENT[/cc] | [cc]AUTO_INCREMENT[/cc] |
| [cc]bool[/cc] | [cc]boolean[/cc] |
| [cc]DEFERRABLE INITIALLY DEFERRED[/cc] | [cc] [/cc] |
| [cc]BEGIN TRANSACTION;[/cc] | [cc]START TRANSACTION ;;[/cc] |
| [cc]INSERT INTO[/cc] | [cc]INSERT IGNORE INTO[/cc] |
| [cc]COMMIT;[/cc] | [cc];;[/cc] |
Before you paste into SQL you must have at least 1 user registered on your local website. This is required for the foreign key checks!
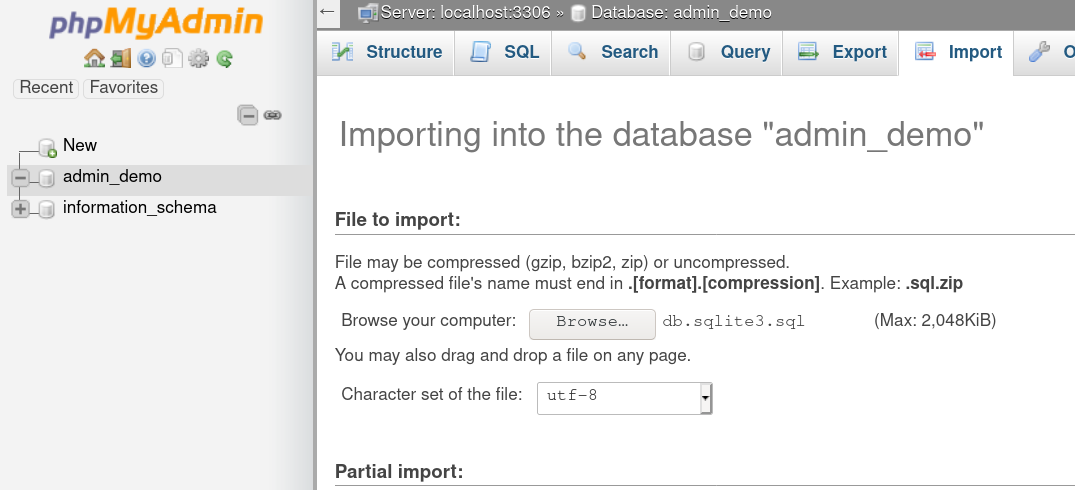
Now you can import your Django SQLite3 Database into MySQL!
Use PhpMyAdmin or use the command line MySQL by logging into your server as root and pasting the whole block at once.
Next you must add the new database to your settings.py inside your Django Project:
Replace the existing django.db.backends.sqlite3 entry in your settings.py:
# Database
# https://docs.djangoproject.com/en/3.0/ref/settings/#databases
DATABASES = {
    # 'default': {
    #     'ENGINE': 'django.db.backends.sqlite3',
    #     'NAME': os.path.join(BASE_DIR, 'db.sqlite3'),
    # },
    'default': {
        'ENGINE': 'django.db.backends.mysql',
        'NAME': 'admin_newdb',
        'USER': 'admin_userace',
        'PASSWORD': 'abc22829md',
        'HOST': 'xxx.xxx.xxx.xxx',
        'PORT': '3306'
    }
}
Edit __init.py__ inside the SAME FOLDER AS settings.py and add:
import pymysql
pymysql.install_as_MySQLdb()
Open your project directory requirements.txt file and add pymysql
pip install -r requirements.txt
# or
pip install pymysql
Now you can connect to the external Database instead of the local SQLite3 Database! Magic, right?
If you don’t have a server yet or a fresh MySQL database (table) ready, then keep following this tutorial:
Uploading Your Django Website Online
Sign up to Vultr.com and launch any of these:
Ubuntu 18.04 with 1 CPU and 1GB of RAM
CentOS 7 (without SE Linux) with 1 CPU and 1GB of RAM
Once the server is “ready”, open a Terminal or Putty
ssh root@xxx.xxx.xxx.xxx
# install VestaCP
curl -O http://vestacp.com/pub/vst-install.sh
bash vst-install.sh
Once that’s finished, go to the URL and login with the password displayed in the Terminal. https://xxx.xxx.xxx.xxx:8083
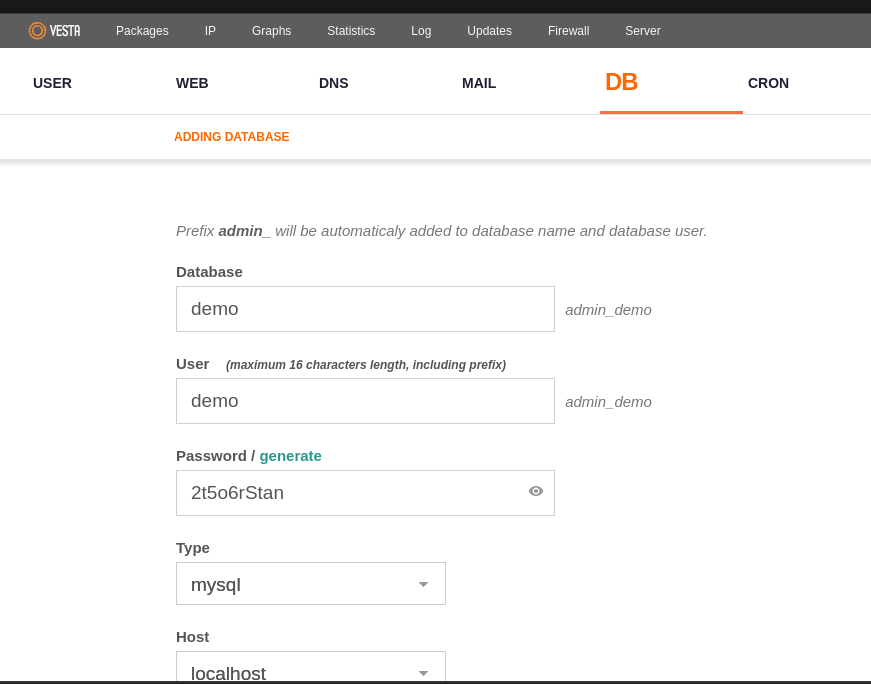
Go to Databases tab in the admin panel and create a new database and password. Put those details into your settings.py
Open https://xxx.xxx.xxx.xxx/phpmyadmin and login with those details your just created.
Click on your Database, upload the database, TURN OFF FOREIGN KEY CHECKING WHILE UPLOADING.