Disclaimer: this guide was written for research purposes only because the Author wanted an .onion version of a normal website.
The Author does not host any hidden services, only .onion addresses for already existing .com websites so that they can be accesses by .onion addresses too.
This guide requires almost NO technical knowledge to start a tor hidden service.
UPDATE 2019: This guide was written in late 2016. It may be updated eventually! We don’t touch TOR so it would be cool to see if anything has changed since this guide was first written.
If you do what this guide says, but don’t harden your service, then any hidden services without doing more than what is mentioned in this guide is pretty much guaranteed to be un-hidden..
You have been sternly warned. I am not a TOR expert and this is not rocket science but if you are familiar with all of the software below already, you will have an even better idea than the Author on hosting through tor.
This website was offline for 7 months earlier this year and in that time another cool post was added for Debian version of this guide. I may write another Debian guide soon as it is always interesting to see what changes version-to-version.
Law Enforcement: this guide is for research purposes only. If you would like this post taken down, please leave an anonymous comment stating so and the post will be promptly removed.
Comes already out-of-the box with:
- nginx
- iptables & fail2ban
- MySQL
This setup does NOT use apache (uses php-fpm instead!).
We recommend NOT using a mail server or allowing ftp access with your VestaCP installation.
Get a VPS on ANY of the following:
# RHEL / CentOS 5,6,7
# Debian 6,7,8
# Ubuntu 12.04-15.10
We highly recommend CentOS and the commands in this guide are based on CentOS only.
Disclaimer: this guide was written because I wanted an .onion version of a normal website.
VestaCP is a free server & hosting control panel. See more at vestacp.com.
Log into your server via SSH.
ssh root@your.server.ip
Download installation script
curl -O http://vestacp.com/pub/vst-install.sh
Next, visit vestacp.com and scroll down to generate some Advanced Install Settings.
Choose the following options, which are, nginx + php+fpm, NO ftp, NO mail, NO DNS.
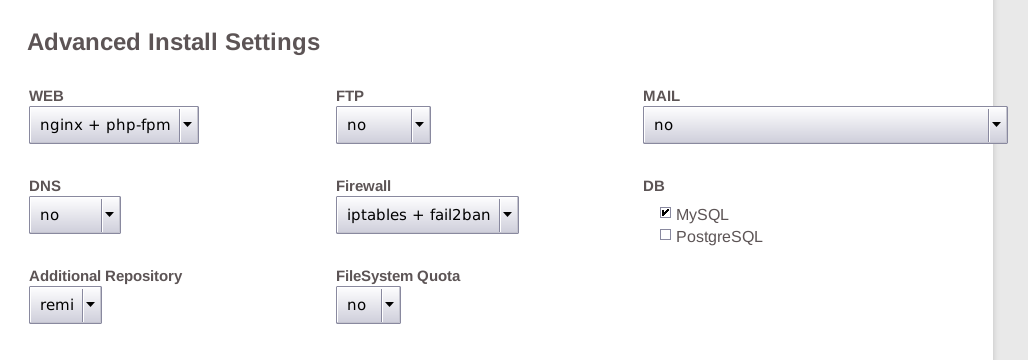
Our generated install command is below, paste this into your terminal.
bash vst-install.sh --nginx yes --phpfpm yes --apache no --vsftpd no --proftpd no --exim no --dovecot no --spamassassin no --clamav no --named no --iptables yes --fail2ban yes --mysql yes --postgresql no --remi yes --quota no
Press y and enter to install VestaCP.
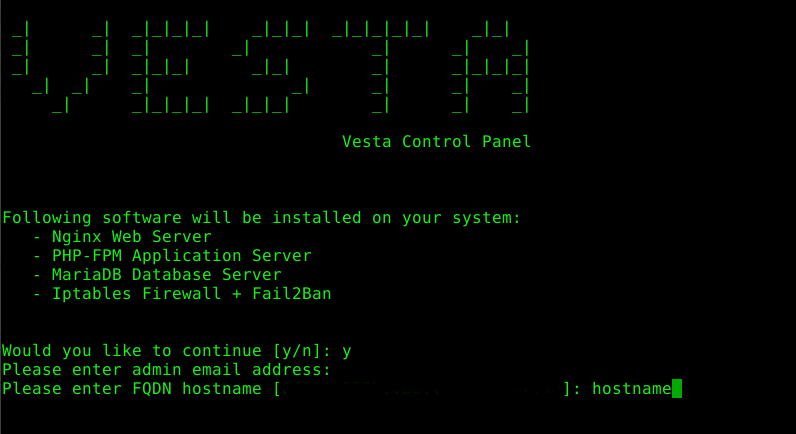
Press enter when it asks for an email (no email).
For hostname, you can change it to anything, I suggest something very generic, so just type hostname and hit enter.
When it’s finished installing, note down the password.
Open a browser (TOR browser) and visit the URL supplied, it will be your server IP with https:// at the start and :8083 at the end.
Tor browser will give you an insecure certificate warning. Click advaned, allow exception, and confirm security exception.
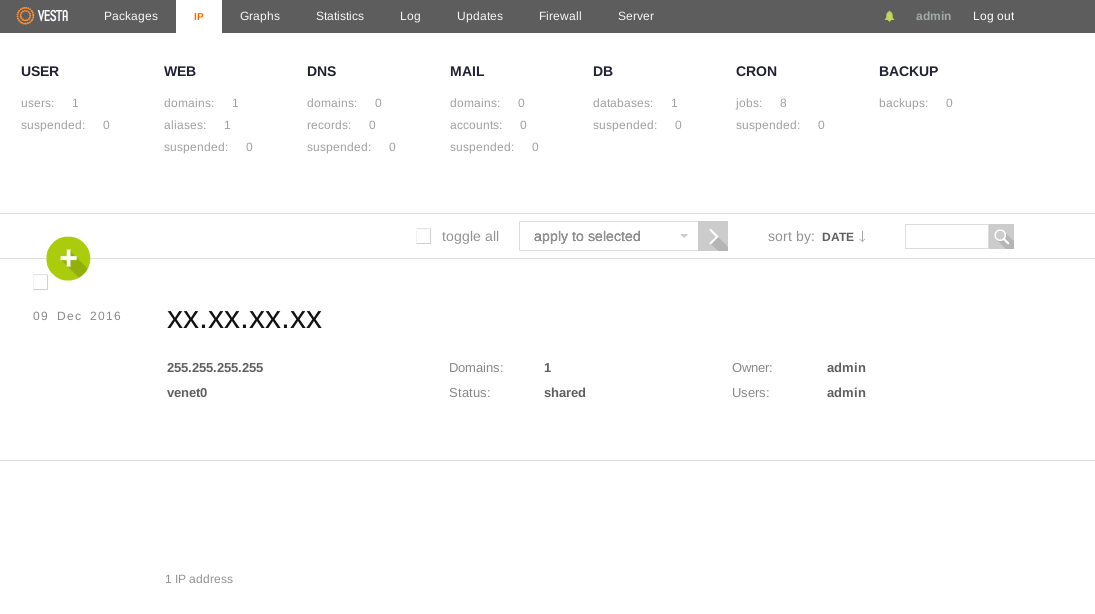
Click on the IP tab at the very top and then click on the green (+) symbol to add an additional IP.
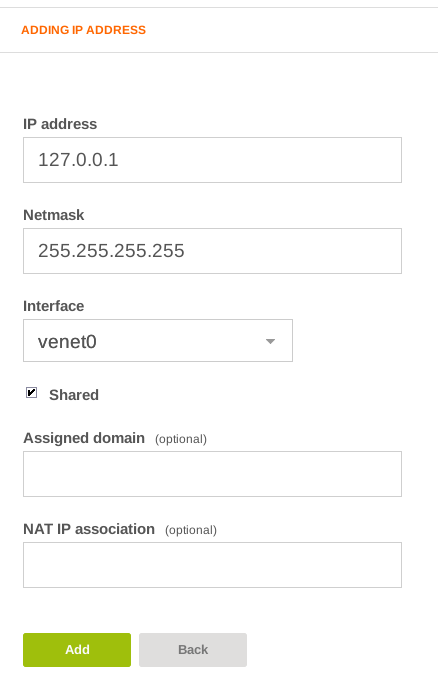
The IP address we want to add is 127.0.0.1. This is the localhost machine IP, but tor will listen on this address on port 80.
This means that your website will only be accessible by the TOR browsers and never by clear-net browsers.
Set Netmask as 255.255.255.255 and change the Interface to venet0.
In a new tab on the Tor Browser, type the IP of your server to see the demo page and make sure the web server is working.
So instead of: https://xx.xx.xx.xx:8083/
Visit http://xx.xx.xx.xx/
You should see a demo page:

Next, go to the WEB tab and delete the example website. To delete the site, you may need to turn javascript on temporarily. Hover over the site, click delete and confirm delete.
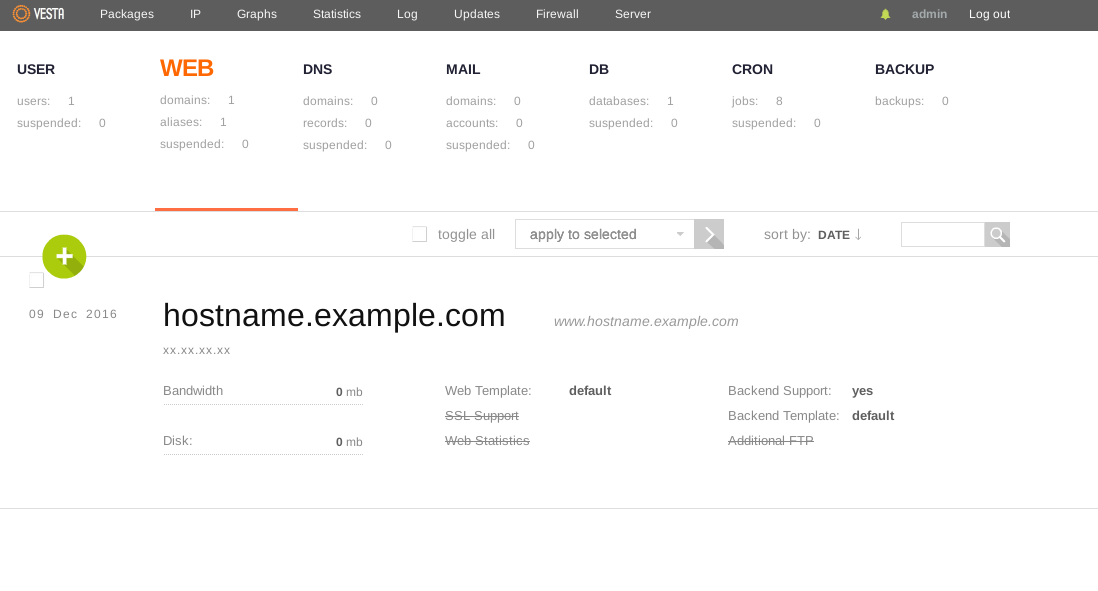
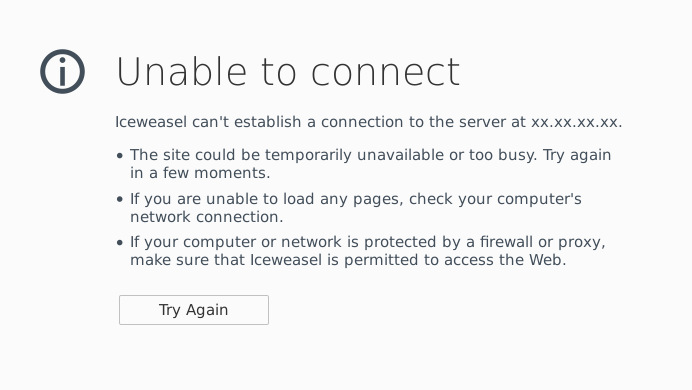
Refresh the other tab with the demo website. It should now give an error.
Go back to your terminal and install tor.
yum install tor -y
Add tor to startup too.
chkconfig tor on
Remove the default tor settings file and replace it with your own as follows.
rm -f /etc/tor/torrc

echo "HiddenServiceDir /var/lib/tor/hidden_service/" >> /etc/tor/torrc

echo "HiddenServicePort 80 127.0.0.1:80" >> /etc/tor/torrc
Start tor.
service tor start
This will generate a new onion address for you.
cat /var/lib/tor/hidden_service/hostname
This is your .onion address.
Now we need to add it to the VestaCP WEB panel and make sure the IP is set to 127.0.0.1.
Make sure DNS and Mail are turned OFF.NOT
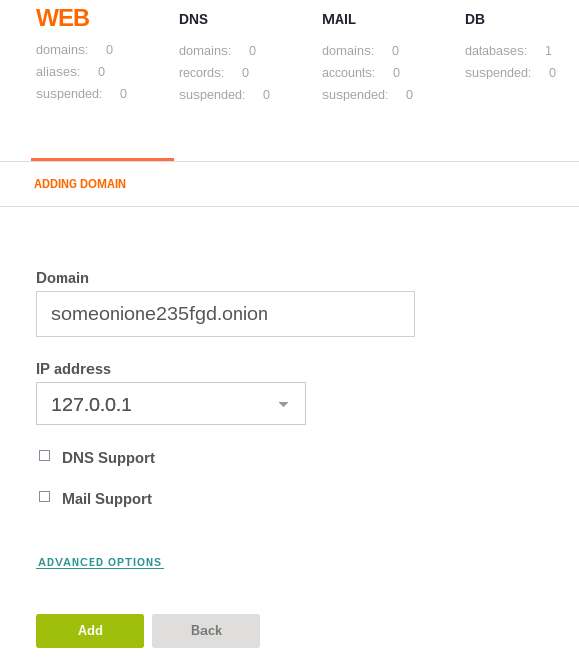
Done!
Now visit your URL is a tor browser.
It may take 5 minutes to show up.
Your service will ONLY be accessible by TOR!
TOR SITE UNAVAILABLE TURNING OFF AFTER REBOOT?
service tor start

service nginx reload
ADDITIONAL SECURITY MEASURES
Go to UPDATES tab and disable autoupdates for vestacp.
Head to the FIREWALL tab and suspend everything except for 22 and 8083.
You can open 25 again later if you need to send emails.
HARDEN YOUR WEB SERVER
This guide is currently for research purposes and does NOT include any hardening tips and is provided as is.
Please see more information here: https://www.reddit.com/r/onions/wiki/hidden_services
You may want to disable phpmyadmin.
HOST MULTIPLE HIDDEN SERVICES ON ONE SERVER
You’ll want to
Open /etc/tor/torrc for editing and add as many services as you want!
Make a new /hidden_service/ directory for each new service:
HiddenServiceDir /var/lib/tor/hidden_service2/

HiddenServicePort 80 127.0.0.1:80
HiddenServiceDir /var/lib/tor/hidden_service3/

HiddenServicePort 80 127.0.0.1:80
Restart tor to generate these new service .onion addresses.
service tor stop

service tor start
Find out the new .onion addresses
cat /var/lib/tor/hidden_service2/hostname

cat /var/lib/tor/hidden_service3/hostname
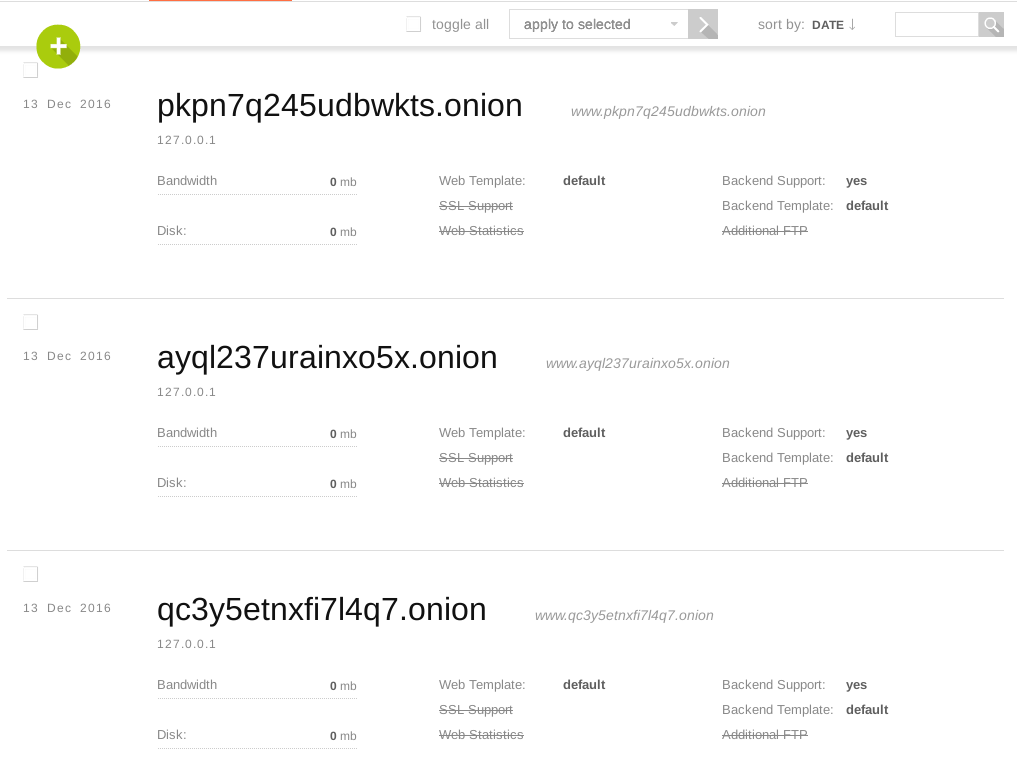
Add each new .onion address into the WEB tab in the VestaCP admin area!
These are example .onions generated and are not live addresses:
HOSTING A .ONION VERSION OF A CLEARNET WEBSITE
I have no idea if this secure or not.
Instead of putting 127.0.0.1 in the torrc file as the HiddenServicePort, change it to the server IP.
Add a new website to your WEB area in the VestaCP admin panel.
This will make your service accessible at both the IP address of your server and at the .onion address.
echo "HiddenServiceDir /var/lib/tor/hidden_service/" >> /etc/tor/torrc

echo "HiddenServicePort 80 xx.xx.xx.xx:80" >> /etc/tor/torrc
Depending on the URL and linking structure of your clearnet website and if there are any htaccess redirects, you may find your .onion service just works for only the homepage and then uses the normal URL because of how your website works.
This guide is, again, for research purposes only, and therefore does not offer any advice on that.

I can no longer connect ssh
Open your VestaCP admin page https://serverip:8083
VestaCP requires https for the admin panel.
Head to the FIREWALL tab and make sure port 22 is open.
After succesfully creating my hidden service, I can see the default page with the onion name… but where are the html/php files?
The websites are in /home/admin/web/
And the website files are in public_html inside each of these folders.
This tutorial does not have any security measures whatsoever, and any uses might be able to see other websites by navigating this folder.
To fix this, create a new user account in VestaCP for each user. each user will have /home/USER/web/
To truly prevent snooping, you’ll need the VestaCP SFTP chroot plugin http://vestacp.com/features/#sftpchroot
The most secure way of hosting multiple hidden services would be to have multiple server.
One server/vps for one website.